
Getting tooth-colored fillings, also known as composite fillings, involves a series of steps that ensure the restoration is properly placed and provides both functional and aesthetic benefits. This guide outlines the process of getting tooth-colored fillings, from initial consultation to post-procedure care, providing patients with a comprehensive understanding of what to expect during their dental visit.
Step 1: Initial Consultation and Examination
The first step in getting tooth-colored fillings is to schedule an initial consultation with your dentist. During this appointment, your dentist will conduct a thorough examination of your teeth to assess the need for fillings. They will check for signs of decay, cracks, or other damage that may require restoration. Dental X-rays may be taken to provide a more detailed view of the affected tooth or teeth.
Step 2: Treatment Planning and Discussion
After the examination, your dentist will discuss their findings with you and recommend the appropriate treatment plan. If tooth-colored fillings are recommended, your dentist will explain the benefits of composite fillings, including their natural appearance and conservative tooth preparation. They will also discuss any alternatives, such as silver amalgam fillings, and address any questions or concerns you may have about the procedure.
Step 3: Preparation of the Tooth
If you decide to proceed with tooth-colored fillings, the next step is tooth preparation. Your dentist will begin by numbing the area around the affected tooth using a local anesthetic to ensure you are comfortable throughout the procedure. Once the tooth is numb, the dentist will use a dental drill or other instruments to remove the decayed or damaged portion of the tooth. The goal is to create a clean and stable foundation for the filling material.
Step 4: Etching and Bonding
After the tooth is prepared, your dentist will etch the surface of the tooth using a mild acid solution. Etching creates a rough surface texture that enhances the bond between the tooth and the composite filling material. The etching solution is rinsed off, and a bonding agent is applied to the tooth. This bonding agent acts as a glue that helps the composite filling adhere securely to the tooth structure.
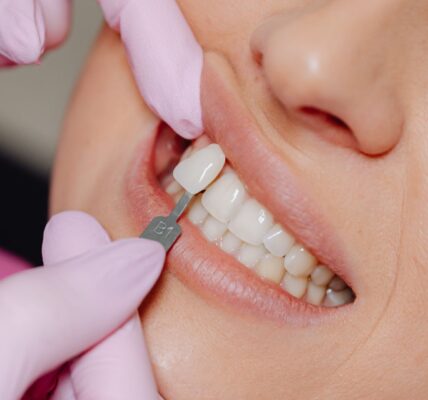
Step 5: Placement of Composite Filling Material
Once the bonding agent is applied, your dentist will carefully layer the tooth-colored composite filling material into the prepared cavity. The composite resin is initially soft and putty-like, allowing your dentist to shape and mold it to closely match the natural contours of your tooth. Different shades of composite resin may be used to achieve a seamless blend with your natural tooth color, ensuring a natural appearance.
Step 6: Sculpting and Shaping
After placing the composite filling material, your dentist will sculpt and shape it to recreate the natural anatomy of the tooth. Special dental instruments and techniques are used to contour the filling and ensure it fits properly within the tooth structure. The goal is to achieve a smooth surface that feels comfortable in your bite and maintains proper alignment with adjacent teeth.
Step 7: Curing and Hardening
Once the filling material is shaped to satisfaction, your dentist will use a curing light to harden or polymerize the composite resin. The curing light emits a specific wavelength of light that activates the photoinitiators in the composite material, causing it to harden within seconds. Multiple layers of composite resin may be cured individually to build up the filling and create a strong, durable restoration.
Step 8: Final Finishing and Polishing
After curing, the composite filling is further refined and polished to achieve a smooth surface texture and natural luster. Your dentist will use polishing instruments and techniques to buff away any rough edges and ensure the filling blends seamlessly with the surrounding tooth enamel. This final step enhances the aesthetics of the restoration and minimizes the risk of plaque buildup or staining over time.
Step 9: Bite Adjustment and Evaluation
Once the filling is polished, your dentist will check your bite (occlusion) to ensure the filling does not interfere with your natural chewing motion. You may be asked to bite down on special paper or other materials to identify any areas where the filling may need further adjustment. Your dentist will make any necessary adjustments to ensure the filling feels comfortable and functions properly when chewing and biting.
Step 10: Post-Procedural Care Instructions
Before concluding the appointment, your dentist will provide you with post-procedural care instructions to promote healing and maintain the longevity of your tooth-colored fillings. These instructions may include:
- Avoiding hard or sticky foods that could damage the filling.
- Practicing good oral hygiene, including brushing and flossing regularly.
- Scheduling regular dental check-ups to monitor the condition of the filling and your overall oral health.
Conclusion
Getting tooth colored fillings Castle hills involves a structured process that begins with an initial consultation and examination, followed by tooth preparation, bonding, placement of the composite filling material, shaping, curing, polishing, bite adjustment, and post-procedural care instructions. This step-by-step guide aims to provide patients with a comprehensive understanding of what to expect during their dental visit for tooth-colored fillings, ensuring a comfortable experience and optimal outcome in restoring their dental health.